
What Is a Smart Telescope? (And Why It Changed Everything for Beginners)
No eyepiece, no star charts, no hour of setup. A smart telescope is a robotic camera-scope that finds, tracks, and photographs the sky for you, here's how it works.
Five years ago, photographing a galaxy meant a mount that cost more than a laptop, a camera bolted to a telescope, cables everywhere, and months of frustrating nights learning polar alignment. Today a device the size of a thermos does all of it, automatically, for a few hundred dollars. That device is a smart telescope, and it is the reason this site exists.
If you have ever stood under a dark sky, looked up, and wished you could keep some of what you saw, this article is for you. We are going to walk through what a smart telescope actually is, what happens inside it during a session, who it suits, who it does not, and the mistakes almost every new owner makes in the first month. No jargon without a plain-English translation, and no pretending the limitations away.
The core idea: it's a camera, not an eyepiece
A smart telescope has no eyepiece. You never look "through" it. Instead, a telescope lens focuses the sky onto a sensitive camera sensor, a small computer inside stacks the incoming light in real time, and the developing image streams to the app on your phone or tablet. You watch a photograph emerge, which, for faint targets, shows you far more than any eyepiece of the same size ever could.
Why does the camera win? Because your eye cannot save up light. Whatever photons arrive in a fraction of a second is all your retina gets to work with, and faint galaxies simply do not deliver enough photons in a fraction of a second to register as more than a gray smudge, if they register at all. A camera sensor has no such deadline. It can sit on a target and accumulate light for ten minutes, forty minutes, three hours, and every extra minute makes the picture cleaner and deeper. That single difference, accumulation versus instant vision, is the whole reason a soda-bottle-sized robot can show you spiral arms that a much larger eyepiece telescope cannot.
This also reframes what "observing" means. With a smart telescope you are not squinting in the cold trying to convince yourself that faint smear is a galaxy. You are sitting in a camp chair, maybe with a warm drink, watching a color image sharpen on your phone while the robot does the tedious part. Some traditionalists miss the eyepiece. Plenty of others, especially people with imperfect eyesight, kids with short attention spans, and anyone who has spent a night fighting a wobbly department-store telescope, find this version of the hobby dramatically more humane.
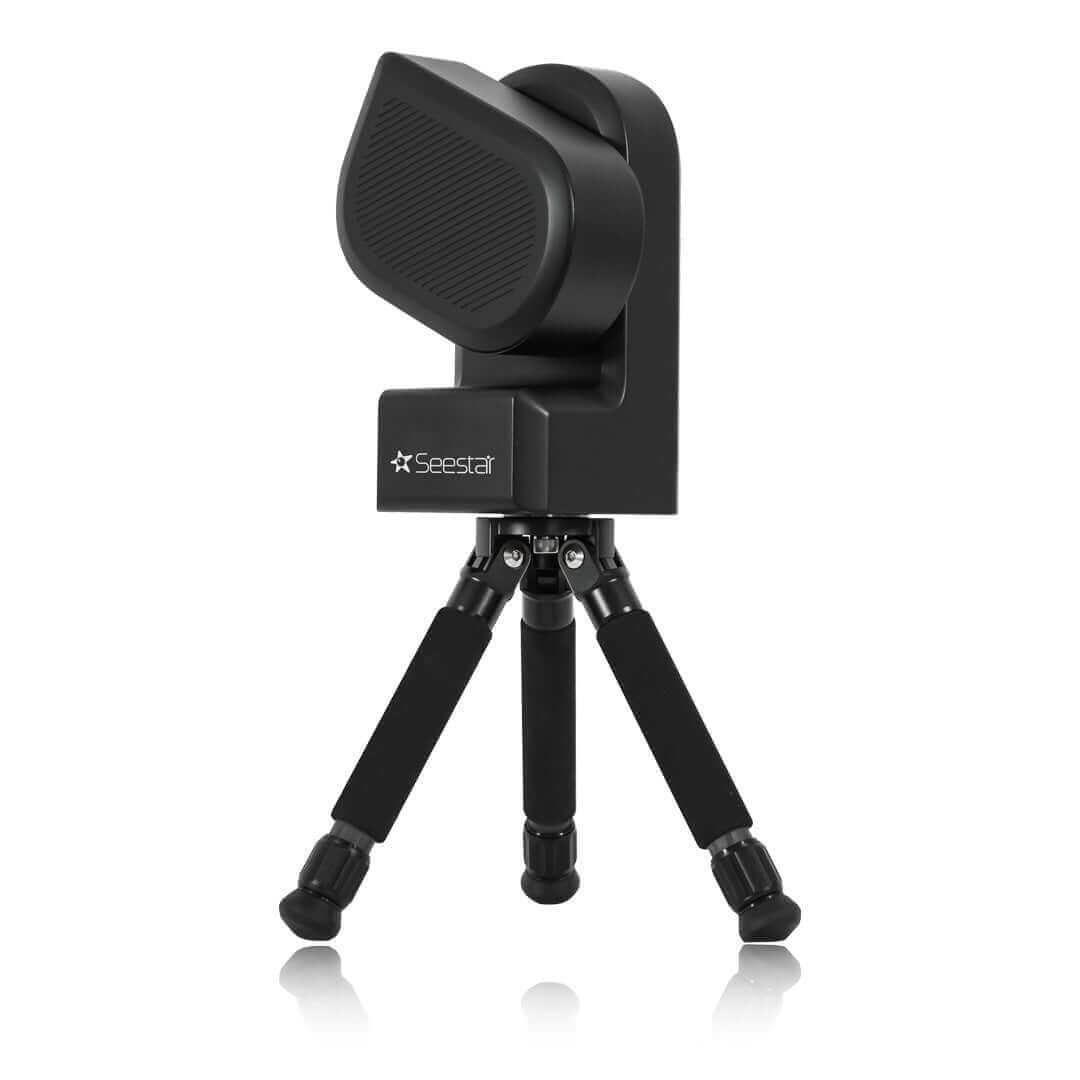
What it does automatically
Here is the automation stack, in the order it happens on a real night:
- Finds itself: using GPS and a technique called plate solving, photographing the stars and matching the pattern against a database, the scope figures out exactly where it's pointed within seconds.[1]
- Finds your target: tap "Orion Nebula" in the app and it slews there. No star charts, no finder scope, no experience required.
- Tracks: motors counteract Earth's rotation so the target stays centered for hours.
- Stacks: it exposes continuously in short frames and merges them live, averaging away noise so faint detail builds up minute by minute (the full story is in Why Stacking Works).
- Filters: the scopes we cover carry built-in filters, including dual-band nebula filters that make emission nebulae imageable even from suburbs.[2]
Plate solving, the trick that killed the learning curve
Plate solving deserves a moment, because it is the technology that removed the single biggest barrier in amateur astronomy: knowing where things are. The scope takes a short photograph of whatever stars happen to be overhead, then matches that exact pattern of star positions against an onboard catalog. Star patterns are effectively fingerprints, no two patches of sky repeat, so one match tells the computer precisely where the tube is aimed. From that moment on, every target in the catalog is just geometry: the scope knows where it is pointing, it knows where the Whirlpool Galaxy is, so it turns the difference into motor movements. You never learn a constellation unless you want to. (You will probably want to. It sneaks up on you.)
Tracking and stacking, the quiet teamwork
The sky moves. Not fast, but fast enough that an untracked long exposure turns stars into streaks. Smart telescopes solve this with two layers working together. Motors follow the sky's rotation, and instead of one long exposure, the scope takes many short ones, typically seconds each, and aligns and merges them in software. If a gust of wind or a bumped tripod ruins one frame, the software simply throws that frame away and keeps stacking the good ones. This is why smart telescopes are so forgiving of imperfect conditions: a mistake costs you ten seconds of data, not the whole night. Traditional astrophotographers had to learn guiding, polar alignment, and dithering to get the same resilience. You get it by pressing one button.[3]
A night with one, minute by minute
Abstractions only go so far, so here is what a genuinely ordinary session looks like for a first-month owner.
8:40 pm. You carry the scope out to the backyard in one hand and a camp chair in the other. Total cargo: the scope, its small tripod, your phone. You set it on the patio table, roughly level, and press the power button.
8:42 pm. The app on your phone finds the scope's own Wi-Fi. You tap "connect." The scope hums, tilts skyward, takes a calibration image or two, and announces it knows where it is. That is the entire setup. Compare that with the hour of assembly, balancing, and alignment a traditional imaging rig demands and you understand why this category exploded.
8:45 pm. You browse tonight's menu. The app suggests targets that are currently well placed; our own Sky Tonight page ranks what is worth your minutes from your exact location, which pairs nicely. You pick the Orion Nebula because everyone picks the Orion Nebula, and they are right to.
8:46 pm. The scope swings, hunts briefly, then locks on. A preview appears: a few bright stars, a gray haze. You tap the button to start imaging.
8:50 pm. Four minutes in, the haze has become a fan of gas with a bright core. There is color now, real color, not the gray your eye would see at an eyepiece.
9:05 pm. Twenty minutes of stacked exposure. Structure everywhere: bright ridges, dark lanes, the tight knot of newborn stars at the center. You have been inside for ten of those minutes refilling your coffee, because the robot did not need you.
9:10 pm. You save the image, text it to two people, and pick a second target. Nobody you texted believes you took it from your backyard with something the size of a thermos.
That is the product. Not the specs, that evening.

What "beginner-grade" means (and why we like it)
This site focuses on the beginner class of smart telescopes, currently ZWO's Seestar family (S30, S30 Pro, S50) and DWARFLAB's Dwarf line (Dwarf Mini, Dwarf 3), all in the $399–699 range.[4] These are small-aperture (30–50 mm) devices built around phone-style sensors, weighing between two and six pounds. Their pitch is not "match a $5,000 rig." Their pitch is: your first galaxy, tonight, with no learning curve, and portability that makes dark-sky travel trivial. They fit in a daypack next to your water bottle, which matters more than any spec when the best skies are a national park away.[5]
It is worth dwelling on the portability point, because it is the most underrated spec in the hobby. Light pollution is the enemy of everything you want to photograph, and the cure is distance: drive out from under the city's glow and the sky gets darker with every mile. A telescope that takes an hour to set up and fills the trunk gets used a handful of times a year, usually in the backyard where the sky is worst. A telescope you can carry in one hand goes camping, goes to the beach house, rides along on the road trip, and therefore spends its life under exactly the skies where it performs best. The best telescope is famously the one you actually use, and nothing in the history of amateur astronomy has been easier to actually use than this class of device. If you want somewhere to point it, our dark-sky park guide has sixty suggestions.
Who a smart telescope is for, and who it is not
A quick decision framework, in plain terms:
A smart telescope is probably right for you if...
- You want photographs of deep-sky objects, nebulae, galaxies, star clusters, without months of learning. This is the category's entire reason to exist.
- Your free time comes in one-hour windows. Setup is minutes, and a session can be productive in twenty. Parents of young kids, this is your instrument.
- You live under suburban light pollution. Stacking and built-in filters claw back a surprising amount of what the streetlights steal, and the portability makes escaping to darker skies painless.
- You want to share the sky. The image streams to a phone or tablet, so a whole family, or a whole campsite, watches together. An eyepiece serves one squinting person at a time.
- You are curious but commitment-shy. The entry price is a few hundred dollars, not a few thousand, and resale demand for these scopes is healthy.
Look elsewhere if...
- Planets are your passion. Small apertures and wide fields make Jupiter a bright disc with moons, not a banded marble. Planetary detail wants a large, long telescope, a different tool for a different job.
- You want the photon-in-the-eye experience. Some people need to know the light hitting their retina left that galaxy millions of years ago. A screen, however honest, is not that. A pair of binoculars or a Dobsonian telescope scratches that itch.
- You already dream of magazine-cover images. If you know you will want to upgrade cameras, swap filters, and process data in desktop software, a traditional rig gives you that runway. A smart scope is a superb on-ramp, but its hardware is sealed.
What it isn't
Honesty matters here. A smart telescope isn't for peering at planets, small apertures and wide-ish fields mean Jupiter is a bright disc with moons, not a swirl of storm bands. It won't produce Hubble posters (see what your images will actually look like). And you give up the direct-photon romance of eyepiece observing. What you get in exchange is the deep sky itself, nebulae, clusters, galaxies, as photographs you made, on night one.

Common beginner mistakes (learn from other people's first month)
- Judging the hobby by a full-Moon suburban night. Your worst possible conditions are a bright Moon plus city light. First-nighters who happen to start then sometimes conclude the scope is weak. It is not; the sky was. Check the Moon before you judge anything, and read our expectations guide before your first session.
- Stopping the stack too early. The preview looks "done" after five minutes, so people stop. Faint detail keeps building for as long as you let it run. Give showpiece targets twenty minutes minimum and faint ones much more; the math of why is in Why Stacking Works.
- Chasing planets first. The most famous objects in the sky are the worst targets for this instrument class. Point it at nebulae and clusters, where it shines.
- Ignoring the weather beyond "cloudy or not." Haze, high humidity, and a target sitting low over a neighbor's roof all soften images. Targets high overhead, on crisp nights, look dramatically better.
- Setting up on a wobbly surface. The software rejects shaken frames, so a bouncy deck quietly wastes half your exposure time. Solid ground beats a springy table.
- Never leaving the backyard. The single biggest image upgrade available to you is a darker sky, and it is free. That daypack portability is a feature; use it.
Quick answers to the questions everyone asks next
Do I need to know the constellations first?
No. The scope's plate solving means it never needs you to point at anything, and the app's catalog means you never need to know where anything is. Most owners find that constellation knowledge arrives anyway, sideways, because once you have photographed the Orion Nebula a dozen times you start noticing Orion himself on the walk to the car. The learning happens after the fun instead of gatekeeping it, which is exactly backwards from how this hobby used to work.
Do I need an internet connection outside?
The scope and your phone talk to each other directly, which is why these devices work at remote campsites far from any cell signal. That is by design: the whole category is built around the assumption that its best nights happen in the middle of nowhere.
Can kids run it?
The app experience is deliberately phone-simple: pick a picture of a target, tap go, watch it appear. A child who can operate a tablet can operate the session, and because the image is on a screen rather than at an eyepiece, there is no fragile moment of trying to get a small squirming person to position their eye correctly in the dark. For families, this is quietly one of the category's best features.
What ruins a session?
Clouds, obviously. Beyond that: a bright Moon when you wanted faint targets, a wobbly setup surface, dew on cold humid nights, and impatience. Notice that every item on that list is either schedulable or fixable, and none of them costs money.
Where to go from here
If this sounds like your kind of hobby, your path is short. First, see what is actually worth photographing tonight from where you stand: that is our Sky Tonight page. Second, if you are ready to pick hardware, our model-by-model comparison, Choosing Your First Smart Telescope, walks the whole beginner field with verified specs and honest recommendations. Third, calibrate your expectations with What Will My Photos Actually Look Like?, because the gap between marketing and night one is real, and so is the delight on the far side of it. And when you are ready to understand the magic trick underneath it all, Why Stacking Works explains how many mediocre frames become one beautiful image. Everything else worth learning lives in our learning hub.
The sky has been putting on this show every clear night for longer than there has been anyone to watch. For the first time, watching it, and keeping what you see, requires no expertise at all. That is what a smart telescope is.
Notes & sources
- ZWO documents the Seestar's automatic alignment, GoTo, and plate-solving behavior in its official FAQ. ZWO Seestar, official FAQ ↩
- DWARFLAB lists the Dwarf 3's built-in filter modes, including its dual-band astro filter, on the official product page. DWARFLAB, Dwarf 3 official product page ↩
- Hands-on reviews describe the short-exposure live-stacking workflow and its forgiveness of bumped tripods and passing clouds. Live Science, Seestar S50 review ↩
- Entry pricing for the class is anchored by the $399 Seestar S30. ZWO, Seestar S30 official page ↩
- The extreme of the portability trend is DWARFLAB's sub-kilogram Dwarf Mini. DWARFLAB, Dwarf Mini official page ↩