
Why Stacking Works: The Idea That Makes Smart Telescopes Possible
Your telescope doesn't take one photo, it takes hundreds and averages them. Here's the beautifully simple math of why that beats any single exposure.
Watch a smart telescope work and you'll see the image on your phone sharpen and deepen minute by minute, like a photograph developing in a darkroom tray. Nothing about the optics is changing. No focus is being tweaked, no magic filter is sliding into place. What's happening is live stacking, and it is the single idea that makes a $400 gadget capable of photographing galaxies. Understand it once and half of your telescope's behavior, the odd short exposures, the occasional discarded frame, the way patience beats settings, suddenly makes sense.
The enemy is noise
Start with the problem. A faint nebula sends your sensor a trickle of photons, a genuinely sparse drizzle of light spread over seconds. Mixed into every exposure is randomness from several sources at once:
- Shot noise from the light itself. Photons arrive randomly, like raindrops on a sidewalk; count them for a short time and the count fluctuates.
- Electronic noise from the sensor: the small errors and warmth-driven jitter of the camera reading itself out.
- Sky glow: light pollution and natural airglow that brighten the background and bring their own random flicker with them.
In one short exposure, faint detail and random noise look identical. A pixel that is slightly bright might be a wisp of nebula, or it might be noise that happened to land there. You genuinely cannot tell a wisp from a patch of static in a single frame, and no amount of clever processing of that single frame can tell you either.[1]
The fix is averaging
Now take a second exposure of the same target. The nebula's light lands in the same pixels as before, because the nebula is really there. It's signal, and signal repeats. The noise doesn't repeat: it's random, different in every frame, sometimes up, sometimes down.
That asymmetry is the whole trick. Average many frames together and the signal stays put, frame after frame, while the noise cancels itself out, ups and downs averaging toward zero. The faint wisp that was indistinguishable from static in one frame is present in all the frames; the static isn't.
The math has a famously tidy form: stack N frames and the signal-to-noise ratio improves by roughly the square root of N. Four frames: twice as clean. Twenty-five frames: five times cleaner. A hundred frames: ten times cleaner. This square-root law is the entire business model of a smart telescope: replace one heroic exposure with hundreds of humble ones and let arithmetic do the heavy lifting.[2]
Notice the shape of that chart: the bars grow, but each doubling of cleanliness costs four times the frames. Stacking has fast early returns and patient late ones. That is not a flaw; it just tells you where the knee of the curve is and why a decent image comes quickly while a great one takes a full evening.
Why many short frames instead of one long one?
A traditional astrophotographer might shoot five-minute exposures on a heavy, precisely aligned tracking mount, where a single ruined frame costs five minutes of night. Smart scopes go the other way: they shoot 10-30 second frames, hundreds of them, and stack live.[3]
Short frames forgive everything:
- A gust of wind shakes the tripod? One frame is ruined, not the night.
- An airplane or satellite streaks through? The software detects the outlier frame and rejects it from the stack.
- A car's headlights sweep the yard? Same story: toss the frame, keep stacking.
- Tracking only has to be accurate for seconds at a time, which is exactly what a small motorized mount can deliver.
The stacking software, running inside the scope itself, aligns each new frame on the stars before adding it, so even slight drift between frames doesn't blur the result. Each frame is a fresh start; the stack is the memory.
This is also why the equatorial modes on the Seestar and Dwarf scopes matter. By tilting the mount to match Earth's axis, they remove field rotation, which allows longer individual frames, 60-90 seconds instead of 10-30.[4] Longer frames mean fewer frame gaps and less of the total exposure spent on per-frame overhead, a real boost when you are chasing faint targets.
Integration time is the currency
Astrophotographers talk about total integration: the sum of all stacked exposure, regardless of how it was sliced into frames. Sixty frames of 10 seconds, twenty frames of 30 seconds, ten frames of a minute: all are "10 minutes of integration," and to a first approximation they buy similar depth. Integration is the currency of this hobby; everything else is denomination.
| Total integration | What the Orion Nebula looks like | The feeling |
|---|---|---|
| 10 minutes | The bright core, beautifully | "It works!" |
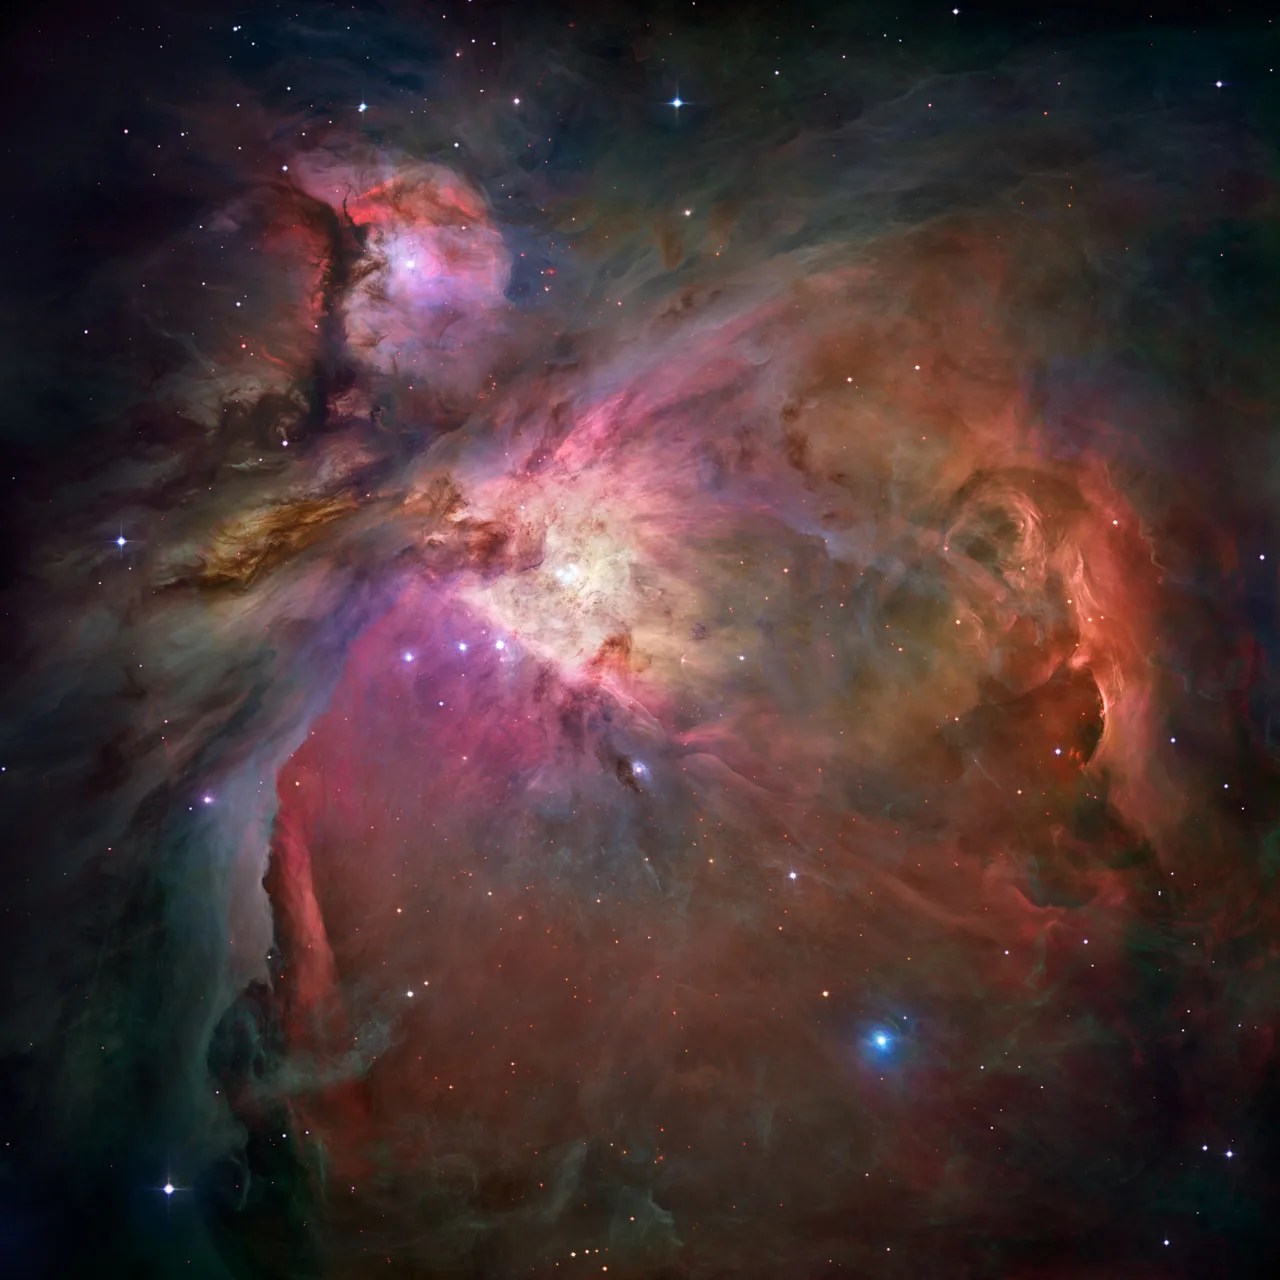
| 1 hour | The faint outer wings emerge | "There's more nebula than I thought." |
| 3 hours (across two nights) | A portfolio image | "I made that with a scope from a backpack." |
So when your first ten-minute result looks noisy: nothing is wrong, with you or the telescope. You're just early on the square-root curve, and the cure is minutes, not money. Many smart scopes will even let you add a second night's frames to the same target, which is how backyard imagers quietly assemble hours of integration one evening at a time.
A worked example: budgeting a school-night session
Say you have from 9 PM to 11:30 PM before sleep wins. That is 150 minutes of potential integration, minus slews, framing, and a snack: call it 120 usable minutes. Here is one sensible budget built on the square-root law.
Spend the first 15 minutes on a bright showpiece; on the steep early part of the curve, a quarter hour genuinely satisfies. Then commit 90 minutes to your main target, the faint one that needs the depth; that is where long integration pays. Keep the last 15 minutes as a scouting stack on a candidate for next week: even a noisy preview tells you whether the framing and the target are worth a future evening. You end the night with one finished postcard, one serious work-in-progress, and one plan. That is stacking used as a strategy, not just a feature.
Calibration: the quiet cleanup crew
You may see your scope mention "dark frames": exposures taken with the optics covered, recording what the sensor reports when no light at all is coming in. They map the sensor's electronic hot pixels and fixed patterns so those can be subtracted from your real images, leaving only the sky's contribution. The scopes handle this automatically, and the Dwarf models even carry a dedicated dark filter in their filter wheel for exactly this purpose.[5] It's classic astrophotography hygiene, the kind traditional imagers do by hand with calibration libraries, done for you while you pour coffee.
Why live stacking changed the hobby
It is worth pausing on the word "live." Traditional astrophotographers stack too, but they do it the morning after, at a computer, discovering only then whether the night's data was any good. Live stacking moves that feedback into the moment: you watch the image improve in real time, you see immediately if focus or framing is off, and you can decide with your own eyes when a target is "done." For a beginner, that feedback loop is the difference between a hobby that teaches you every session and one that makes you wait a day to learn you failed. It also makes astronomy social again: the developing image on a phone screen is something a whole family can gather around, which no eyepiece and no morning-after processing session ever offered.
One frame's journey
To make the whole pipeline concrete, follow a single 15-second exposure from shutter to screen.
First, the sensor collects light: a faint dusting of photons from the target, a heavier wash from the sky, plus the sensor's own electronic murmur. The frame is read out, and calibration is applied: the dark-frame map subtracts the sensor's known hot pixels and fixed patterns, leaving a cleaner but still noisy image.
Next comes quality control. The software measures the frame: are the stars round points, or streaks from a bump or gust? Is there a satellite trail slicing through? A frame that fails inspection is discarded, and the stack is no poorer for it, that is the luxury of short exposures.
Then alignment. The software identifies star patterns in the frame and matches them against the running stack, shifting and rotating the newcomer until its stars sit exactly on top of their predecessors. This is why field drift and rotation between frames do not blur the result: every frame is snapped onto the same grid before it counts.
Finally, averaging. The aligned frame is folded into the running stack, signal reinforcing signal, noise partially cancelling noise, and the updated image is pushed to your phone. Total elapsed time: seconds. Your telescope does this hundreds of times a night, and each cycle nudges the picture a little closer to the sky's truth.
What stacking cannot do
Stacking is powerful enough that beginners sometimes treat it as unconditional magic. It has three hard limits worth knowing, because each one points to a fix that stacking itself cannot provide.
- It cannot subtract a sky brighter than your target. Averaging removes random noise, but sky glow has a steady component too: a floor of brightness that sits under everything. If your target's faintest regions are dimmer than that floor, no number of frames recovers them. The fix is a darker sky or, for emission nebulae, a filter, not more minutes.
- It cannot sharpen what the frames never captured. Stacking averages frames; it does not repair them. Soft focus, dew on the lens, or a target quivering in low-altitude turbulence produce soft frames, and the average of soft frames is a soft image. Fix focus and altitude first; stack second.
- It cannot outvote clouds. Frames shot through drifting haze contribute murk faster than they contribute signal. When conditions fail, the right move is to stop, keep what you have, and resume on a better night, most smart scopes will happily continue a target across sessions.
The pattern in all three: stacking beats randomness, and only randomness. Anything systematic, glow, blur, haze, gets averaged in rather than averaged out. Knowing the difference is what separates "stack longer" nights from "fix something" nights.
Beginner FAQ
- Do I lose anything by shooting across multiple nights? Practically, no: integration is integration. Framing shifts slightly between nights, so the edges get trimmed a little more, but the depth gain swamps that cost.
- Why did my scope throw away frames on a windy night? Because they failed the star-shape inspection, and that is the system working. Streaked frames would blur the stack; rejecting them protects your good data.
- Is a 10-minute stack under dark skies better than an hour in the city? For faint broadband targets, often yes. Darkness lowers the noise floor each frame starts from, so every stacked minute works harder. Time and darkness multiply; they don't merely add.
- Should I use equatorial mode for everything? If your scope has it and you're settling in for a long session on a faint target, yes, it earns its extra setup minute. For quick looks and bright showpieces, standard mode is fine.
- When do I stop stacking? When the image stops improving to your eye, when the target sinks below about 30° altitude, or when conditions change. The square-root law means the second hour always improves things less than the first; where to stop is taste, not physics.
Common beginner mistakes
- Quitting at ten minutes. The most common one. Early stacks of faint targets look disappointing by design; the square-root curve simply hasn't done its work yet. Decide the integration budget before the session and let it run.
- Chasing settings instead of minutes. Fiddling with parameters mid-stack usually restarts your progress. For faint targets, the honest levers are total integration, sky darkness, and target altitude, in that order.
- Comparing your 20 minutes to someone's 5 hours. The images you admire online usually state their integration time in the caption. Check it before concluding your scope is inferior; it is almost always a time gap, not a gear gap.
- Ignoring rejected frames. A few discarded frames per session is normal housekeeping. A large fraction rejected means something systematic: wind, a wobbly surface, dew on the lens, or an obstruction. Fix the cause instead of just stacking longer.
- Stacking through changing conditions. If clouds drift in or the target sinks into the murk below 30° altitude, extra frames add more noise than signal. Better to stop, and finish the target on another night.
Put it to work tonight
- Pick a bright emission nebula or cluster from Sky Tonight and let it stack for exactly 5 minutes. Save the result.
- Keep stacking the same target to 20 minutes, then 40, saving at each checkpoint. Compare the three images side by side: you have just watched the square-root law with your own eyes, and you now know what a given number of minutes buys under your sky.
- Check your target's altitude on the target list first; high targets waste fewer of your frames on atmospheric blur, so every stacked minute works harder.
- Planning a dark-sky trip? Browse the park pages and remember the multiplier: the same integration time goes dramatically deeper under a darker sky, because the noise floor you are averaging away starts lower.
- Start a target you can revisit: a multi-night total of two or three hours on one object will beat five scattered twenty-minute snapshots, every time.
Stacking is the rare piece of technical magic that gets more impressive once you understand it: no exotic hardware, just the patient arithmetic of averaging, run by a little telescope that never gets bored. Signal repeats. Noise doesn't. Everything else is minutes.
Notes & sources
- Noise sources in astrophotography, shot noise, sensor noise, and sky background, and why single short exposures cannot separate faint signal from noise. Sky & Telescope, Astrophotography tips ↩
- Stacking N aligned frames improves signal-to-noise by roughly the square root of N, the foundational relationship behind image stacking. Sky & Telescope, Astrophotography tips ↩
- The Seestar's documented imaging behavior: short sub-exposures stacked live inside the scope, with automatic frame alignment and rejection. ZWO Seestar, official FAQ ↩
- Equatorial-mode operation and longer per-frame exposures on the Seestar and Dwarf smart telescopes. ZWO Seestar FAQ; DWARFLAB Help Center ↩
- Dark-frame calibration in smart telescopes, including the Dwarf models' built-in dark filter used for automatic sensor calibration. DWARFLAB Help Center, imaging modes and calibration ↩