
Seestar S50: Your First Night, Step by Step
From box to first galaxy in under an hour. The complete first-night routine for the scope that started it all, plus the settings that matter later.
The Seestar S50 is the best-selling smart telescope ever made, with over 50,000 units in the field, and although ZWO has discontinued it in favor of a coming S50 Pro, tens of thousands of first nights still start with this scope.[1] That popularity is not an accident. The S50 hits a sweet spot of aperture, automation, and price that made an entire generation of people realize they could photograph galaxies from a lawn chair. If one just arrived on your doorstep, or if you picked one up secondhand now that the market is full of them, this guide is the routine that makes your first night smooth instead of frustrating.
Here is the honest truth about first nights with any smart telescope: almost every failure people report is a preparation failure, not an equipment failure. A dead battery at 9 p.m., a firmware update eating the only clear hour of the week, a tripod on a wobbly deck, a target that was below the horizon the whole time. All of it is avoidable, and avoiding it takes about fifteen minutes of indoor work before sunset. So that is where we start.
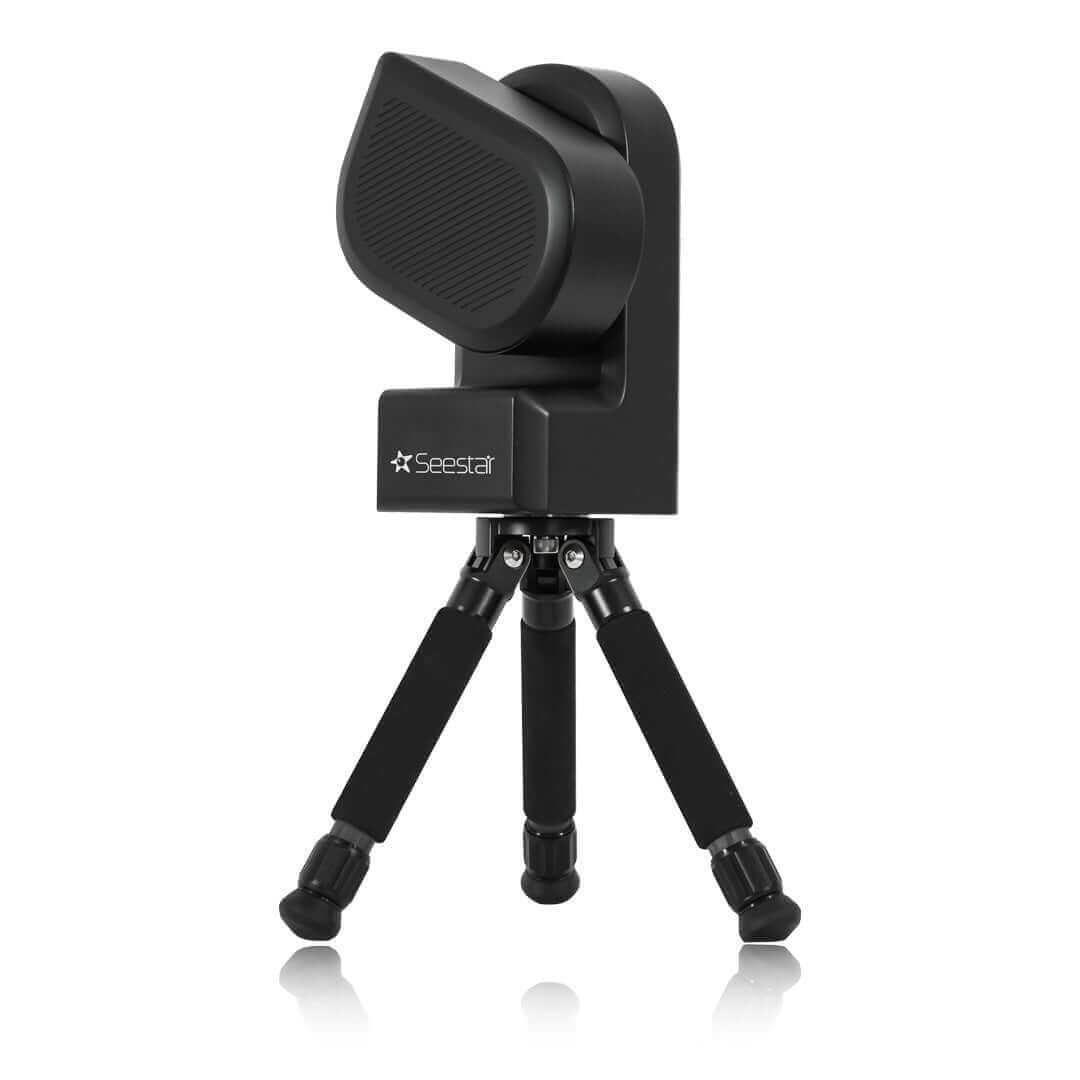
What you are working with
Quick orientation before the checklist. The S50 is an all-in-one: a 50 mm apochromatic triplet at 250 mm focal length, a cooled-adjacent little camera, a motorized alt-azimuth mount, a plate-solving computer, and a battery, all in one 2.5 kg body that folds into its own arm.[2] You control everything from the Seestar app on your phone. There is no eyepiece; the scope takes many short exposures of a target and stacks them live into one deepening image on your screen. If the idea of stacking is new to you, our explainer on why stacking works is a five-minute read that will make everything on this page click.
Three hardware details matter tonight: the built-in 6000 mAh battery runs roughly six hours, the lens has a slide-out dew shield built into the body, and there is an internal light-pollution dual-band filter you can toggle from the app.[3] Remember all three. They each get their moment below.
The pre-flight checklist (indoors, the day before or the afternoon of)
Print this, screenshot it, whatever works. Every item here has ended someone's first night when skipped.
- Charge to 100%. The battery gives you about six hours of real use, and lithium batteries deliver less in the cold. Starting at full charge means the battery is never the thing that ends your night. If you plan an all-nighter, pack a USB power bank too; the scope can sip power while it works.
- Install the Seestar app and create your account at home. Do this on good home Wi-Fi, not in a field with one bar of signal. Log in once, poke around the interface, and find where the target catalog lives so it is familiar in the dark.
- Update the firmware now, not tonight. Connect the scope once indoors and let it take any pending update. ZWO ships meaningful features by firmware, mosaic framing and the equatorial mode both arrived this way, and you do not want a long download eating your dark window.[4]
- Do a living-room dry run. Power the scope on, connect your phone to it, open the app, and slew it a few degrees. Two minutes of this indoors removes ninety percent of the fumbling outdoors. You will also hear what the motors sound like, so nothing surprises you later.
- Check your phone. Charged, storage space free for the images you will save, screen brightness turned down, and if your phone has a red-tint or night-shift mode, learn where the toggle is. Your dark adaptation will thank you.
- Check the sky. Clouds are obvious, but the Moon matters just as much: a bright Moon washes out faint nebulae and galaxies. Our Sky Tonight page gives you the forecast, the Moon phase, and a ranked list of what is actually well placed from your location tonight. For the deeper story on how the lunar cycle shapes what you can shoot, see moon phases and astrophotography.
- Pick your spot in daylight. If you are heading somewhere darker than the backyard, scout it first. Our park finder helps you locate dark, publicly accessible spots near you. Look for a clear view to the south, no streetlight glaring straight at the scope, and ground that is firm. Grass beats concrete for vibration; packed dirt beats a wooden deck by a mile.
- Pack the kit. Scope, tripod, phone, power bank, a red flashlight or headlamp, a warm layer beyond what the forecast suggests, something to sit on, and water. Cold, thirsty people go home early; comfortable people stay for the good stuff after midnight.
Your first session, as it should actually go
Here is a realistic walkthrough of a good first night, minute by minute, so you know what normal feels like.
Twilight. You arrive while there is still light. This is deliberate. Spread the tripod legs fully and press each foot into the ground. Set the scope on the tripod and check it is seated firmly. Pick your spot with a view to the south if you can get one; from northern latitudes, most deep-sky showpieces cross the southern half of the sky. Face the scope away from any streetlight or porch light. Now sit down and let the sky darken while you eat something. Rushing this part gains you nothing; the good targets need real darkness anyway.
Power up and level. When the first stars appear, power the scope on and open the app. It will walk you through leveling using the built-in sensor. This is the single most important thirty seconds of the night: goto accuracy, tracking quality, and stacking success all lean on a level base. Nudge tripod legs until the indicator is properly centered, not just close. If the ground is soft, press the feet in again and re-check; tripods settle.
Connect. Your phone joins the scope's own Wi-Fi network, and the app handles the handshake. You are now operational. Expect the scope to spend a short while getting its bearings when you send it to the first target: it slews, takes a picture of the star field, plate-solves it to work out exactly where it is pointing, and corrects. Watching it do this the first time is half the fun.
Target one: the Moon, if it is up. Tap it in the app. It is instant, bright, and spectacular along the terminator, the line between lunar day and night where shadows stretch long and craters look three-dimensional. More importantly, it confirms in ten seconds that your focus, pointing, and connection all work. If the Moon is not up, do not mourn; a moonless sky is better for everything else tonight.
Target two: a bright star cluster. The Hercules Cluster in summer, the Double Cluster in autumn and winter, the Beehive in late winter and spring. Clusters are forgiving of everything: light pollution, moonlight, short stacks, mediocre focus. They resolve into fields of pinpoint stars within a couple of minutes of stacking and give you an early, guaranteed win. Run the autofocus routine here and look at the stars at full zoom: they should be tight points, not soft blobs.
Target three: the season's showpiece. Orion Nebula in winter, the Lagoon in summer, Andromeda in autumn. Tap it, let the scope plate-solve and center, and then comes the most important instruction in this whole guide: let the stack run at least ten minutes before judging anything. The first frame will look like noise with a smudge in it. That is normal. Stacking is a patience game where the image visibly improves every minute as more light accumulates and noise averages away. Ten minutes in, you will see structure. Thirty minutes in, you will be showing strangers. Again, the stacking explainer covers exactly why more time keeps paying off.
While it stacks. Extend the dew shield if there is any humidity at all; in damp parks it is not optional, and a dewed lens quietly ruins an hour of stacking before you notice. Check the battery level. Look up with your own eyes and learn the constellations around your target. The scope does not need you hovering.
Closing down. Before you power off, make sure the images you care about are saved to your phone. Then close the scope up from the app so the arm folds and the lens is protected, power down, and pack up with your red light. Total elapsed time from arrival to first deep-sky image, for most people, is under an hour.
A seasonal target menu
These are the reliable showpieces, the targets that look good even on night one and keep rewarding longer stacks for years. Check Sky Tonight for exact rise and set times from your location.
- Winter: the Orion Nebula is the finest nebula in the northern sky and forgiving of everything; the Pleiades shows its icy blue stars even in short stacks; the Double Cluster rides high and resolves beautifully at 250 mm.
- Spring: the Beehive Cluster is a sprawling, cheerful field of stars; late in spring the Hercules Cluster climbs into view, a ball of hundreds of thousands of ancient suns.
- Summer: the Lagoon Nebula glows low in the south and loves the dual-band filter; the Ring Nebula is small but unmistakable, a smoke ring hanging among the stars; the Dumbbell Nebula is larger and brighter, a dying star's exhaled shell; and the Hercules Cluster is at its best.
- Autumn: the Andromeda Galaxy overflows the S50's narrow field gorgeously, and mosaic mode (more below) captures it whole; the Double Cluster returns for the winter; the Pleiades rises late evening.
A note on expectations: the S50's 0.7 by 1.3 degree field is deep and narrow.[5] It frames clusters, small and mid-sized nebulae, and galaxies well; the biggest objects, like Andromeda, spill past the edges unless you mosaic. That is a feature to plan around, not a flaw.
Settings that matter as you level up
- The LP filter: the S50 carries an internal light-pollution dual-band filter. Turn it on for emission nebulae, the ones that glow with their own light: Lagoon, Orion, and their kin. Leave it off for galaxies, clusters, and reflection nebulae, which shine by starlight; the filter only dims them.[6]
- Mosaic mode: for targets wider than the S50's field, mosaic framing stitches neighboring panels automatically. Andromeda is the classic first mosaic. Budget more time than a single-frame target; each panel needs its own integration.
- EQ mode: once you are comfortable, mount the scope tilted to your latitude, with the app guiding the setup. This kills field rotation and unlocks longer sub-exposures for cleaner faint detail. More in the leveling-up section below.
- Sub-exposure length: the default short frames are safest, because short frames forgive small tracking wobbles and gusts. Try longer frames only after your leveling and conditions are consistently good, and compare results on the same target before committing.
Troubleshooting: symptom, cause, fix
| Symptom | Likely cause | Fix |
|---|---|---|
| "Failed to go to target" | Poor leveling, or the target is too low or blocked by a tree or building | Re-level carefully; check the target's altitude on Sky Tonight and skip anything below about 20 degrees |
| Bloated, soft stars | Focus has drifted as the temperature dropped | Run autofocus again; expect to refocus once or twice on any long night |
| Image gets hazy and stars grow halos mid-session | Dew forming on the front lens | Extend the slide-out dew shield at the start of every humid session; if dew has formed, point the scope down and give it time to clear |
| Stack keeps discarding frames | Wind or vibration shaking the scope | Shield the tripod from the wind, hang weight from the tripod hook, move off decks and onto grass, or use shorter sub-exposures |
| Nebula looks dim and washed out | Moonlight or light pollution, or the LP filter is off for an emission target | Enable the dual-band filter for emission nebulae; save faint targets for moonless nights (see moon phases) |
| Galaxy is barely visible after a short stack | Not enough integration time yet | This is normal; let it run 20 to 40 minutes and re-judge (see why stacking works) |
| App loses connection to the scope | Phone wandered out of Wi-Fi range or switched networks | Stay within a few meters, disable auto-join on other networks, reconnect; the scope keeps stacking during brief dropouts |
| Session ends early | Battery drained faster than expected in the cold | Start at 100%, keep a USB power bank connected on cold nights |
Care and transport
The S50 is genuinely robust, but a few habits keep it that way.
- Always transport it closed. Let the app park the arm and shut the scope down properly before you pack it. The folded position protects the optics and the mount gears.
- Use the case. The scope travels well in its supplied case or any padded bag that holds it snugly. Do not let it roll loose in a car trunk.
- Manage moisture. After a dewy night, do not seal a wet scope in a closed case for a week. Let it dry indoors, open to the air, before storing. A couple of desiccant packs in the case are cheap insurance.
- Do not wipe the lens casually. Dust does far less harm to your images than a scratched coating. Use a blower first, and clean the glass rarely and gently.
- Mind temperature swings. Bringing a cold scope into a warm humid house fogs every surface, inside and out. Leave it in its closed case for an hour to warm up gradually.
- Battery health: store it partially charged if it will sit unused for months, and top it up before each session rather than leaving it on the charger indefinitely.
Leveling up: the second month and beyond
The S50 has a long skill ceiling hiding behind its one-tap interface. When first-night novelty wears off, here is where the depth is.
- Learn EQ mode properly. In its default alt-az orientation, the scope tracks targets with two axes, and the field slowly rotates around the target as the night goes on; the stacker crops the rotated edges away. Tilt the scope over to your latitude in EQ mode and that rotation disappears, so you keep the full frame and can run longer sub-exposures, which pull faint outer detail out of galaxies and nebulae. The setup takes an extra few minutes and is completely worth learning on a night when you are not also learning everything else.
- Shoot your first mosaic. Andromeda is the canonical choice: it is far bigger than the S50's field, and mosaic framing builds it from stitched panels. Pick a moonless night, start early, and give it the whole evening.
- Revisit targets across nights. This is the biggest unlock nobody tells beginners: integration is cumulative in effect. A target you gave 30 minutes on Tuesday can get another hour on Friday, and the deeper result will show detail neither night could alone. Keep a simple log of what you shot and for how long, and build up your personal best on each showpiece across a season.
- Chase the calendar. Plan sessions around new Moon for faint galaxies and nebulae, and use bright-Moon nights for the Moon itself and star clusters. Our moon phase guide turns this into a simple monthly rhythm.
- Compare notes. The S50 community is enormous, which means every question you will ever have has been answered somewhere, and reviews like AstroBackyard's long-term field test are full of settings wisdom that only shows up after months of use.[7]
And if you are reading this while still deciding whether the S50, one of its wider-field siblings, or a competitor fits you best, our guide to choosing your first smart telescope compares the whole class in one place.
Notes & sources
- Sales volume and the S50's discontinuation in anticipation of an S50 Pro. Telescope Advisor ↩
- Optical and physical specifications from the manufacturer's product page. ZWO ↩
- Battery capacity, runtime, dew shield, and internal filter details. ZWO ↩
- Feature history delivered via firmware, including mosaic framing and equatorial mode. ZWO Seestar S50 FAQ ↩
- Field of view figures for the S50. ZWO ↩
- Guidance on when the dual-band filter helps and when it hurts. ZWO Seestar S50 FAQ ↩
- Long-term field impressions and practical settings advice. AstroBackyard ↩